
This AI Earrings Try-On tutorial explains how to place earrings, studs, hoops, and short drop earrings naturally onto a model photo. With the AI Earrings Try-On tool, jewelry sellers can quickly create realistic product images for online stores, product detail pages, social media, and advertising.
You will learn how to prepare model and earring images, choose the right type of reference photo, enter an accurate product size, generate the try-on result, and troubleshoot common problems such as incorrect scale or placement.
What Is AI Earrings Try-On?
AI earrings try-on uses a model photo and an earring reference image to create a new image that shows the jewelry being worn. The tool analyzes the visible ear, the product shape, and the size you provide, then positions the earring while preserving the model's appearance and the jewelry's key details.
This workflow is especially useful when you need consistent model photography for multiple products without arranging a separate photo shoot for every earring design.
Which Earrings Work Best?
The tool works best with studs, small earrings, hoops, huggies, ear clips, and short drop earrings. As a practical guideline, the total height of the earring should not be dramatically greater than the visible height of the model's ear. This gives the AI a clearer reference for realistic placement and scale.
Large statement earrings, long chandelier styles, and products with complex chains can also be tested, but the final image should be checked carefully for proportion, hanging direction, attachment point, and symmetry.
How to Choose a Model Photo
Use a sharp, well-lit portrait with natural skin texture. An image width or height of approximately 1,000–2,000 pixels is normally sufficient. At least half of the model's face should be visible, and the ear that will wear the jewelry must be clear and unobstructed.
Avoid photos in which the head is very small, hair covers the ear, or the face is heavily blurred. When the ear is difficult to identify, the AI may place the product too high, too low, or at the wrong angle.
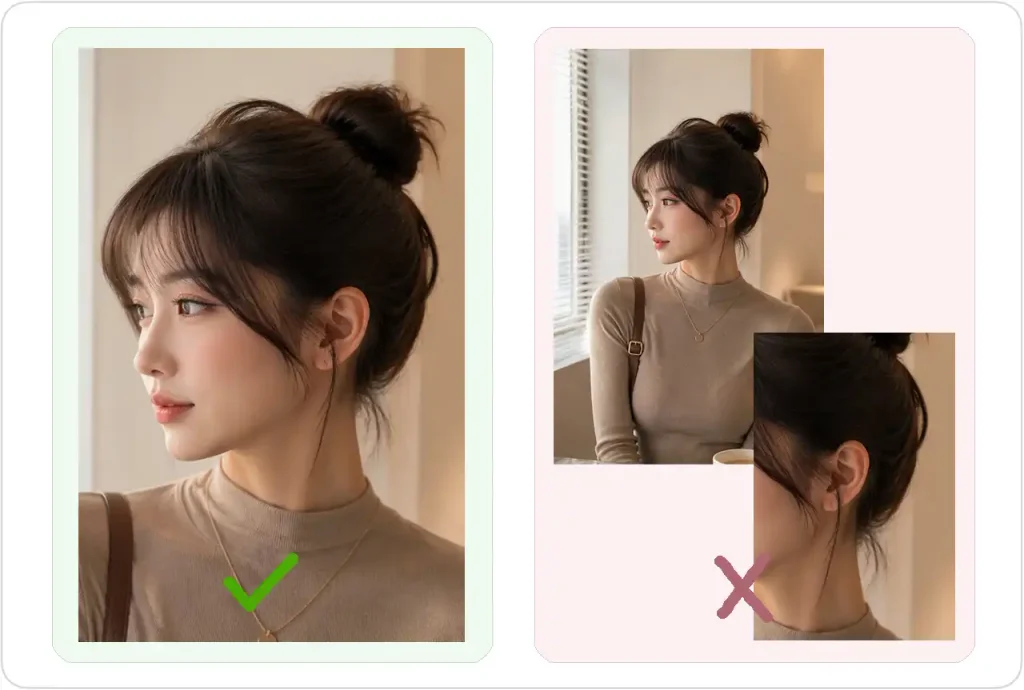
Product Photo or Wearing Reference: Which Is Better?
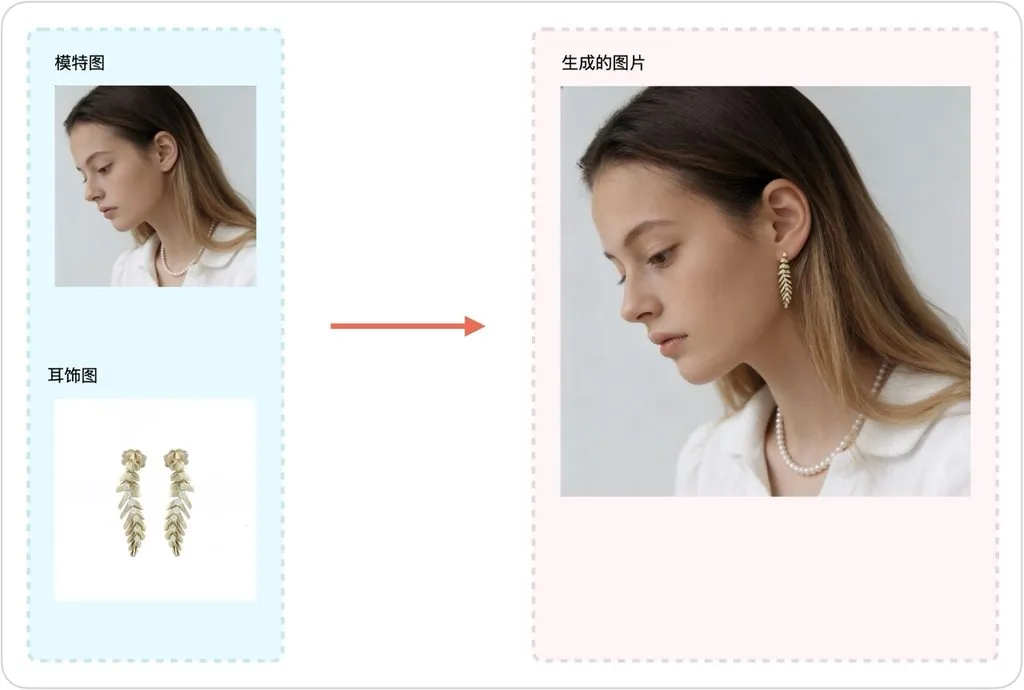
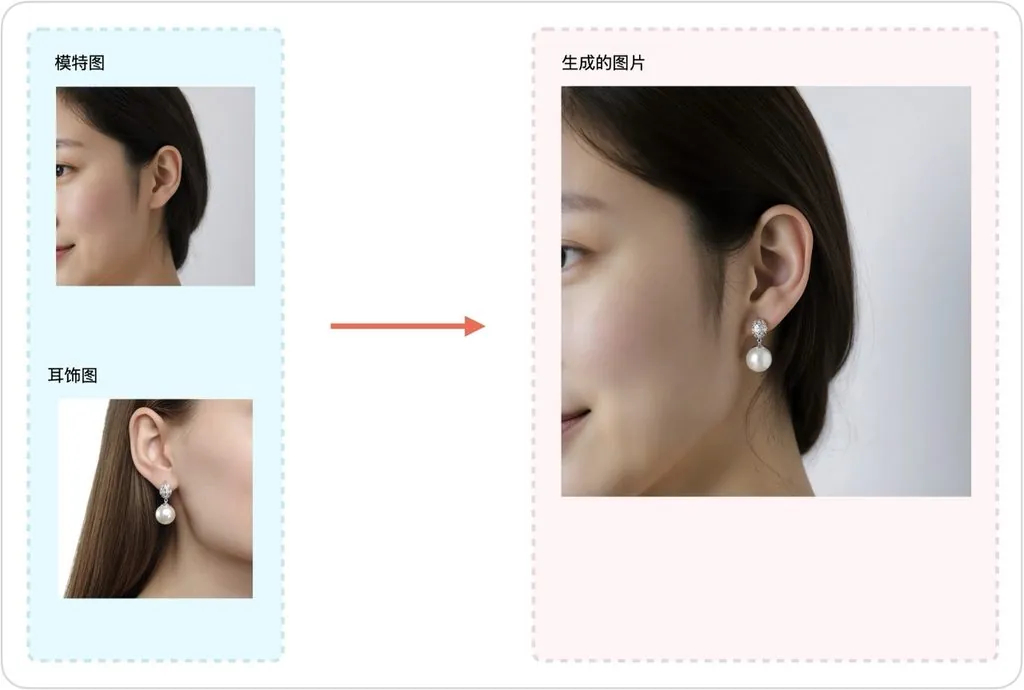
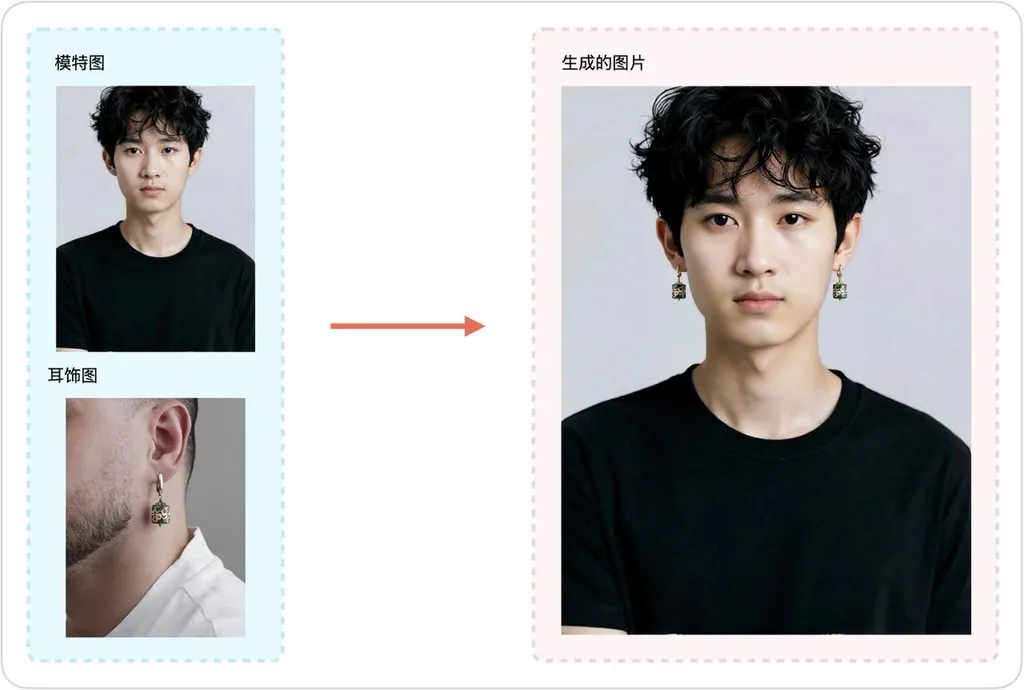
When possible, use a close-up reference image that shows the earring being worn on a real ear.
A clean product photo shows the design clearly, but it does not tell the AI the real-world scale, attachment point, or hanging direction. This is particularly important for hooks, clips, drop earrings, and unusual structures that look different when worn than when placed flat.
A wearing reference helps the tool understand:
- The actual size of the earring
- The correct piercing or attachment point
- The natural hanging direction
- The proportion between the jewelry and the earlobe
- The angle of the product when worn
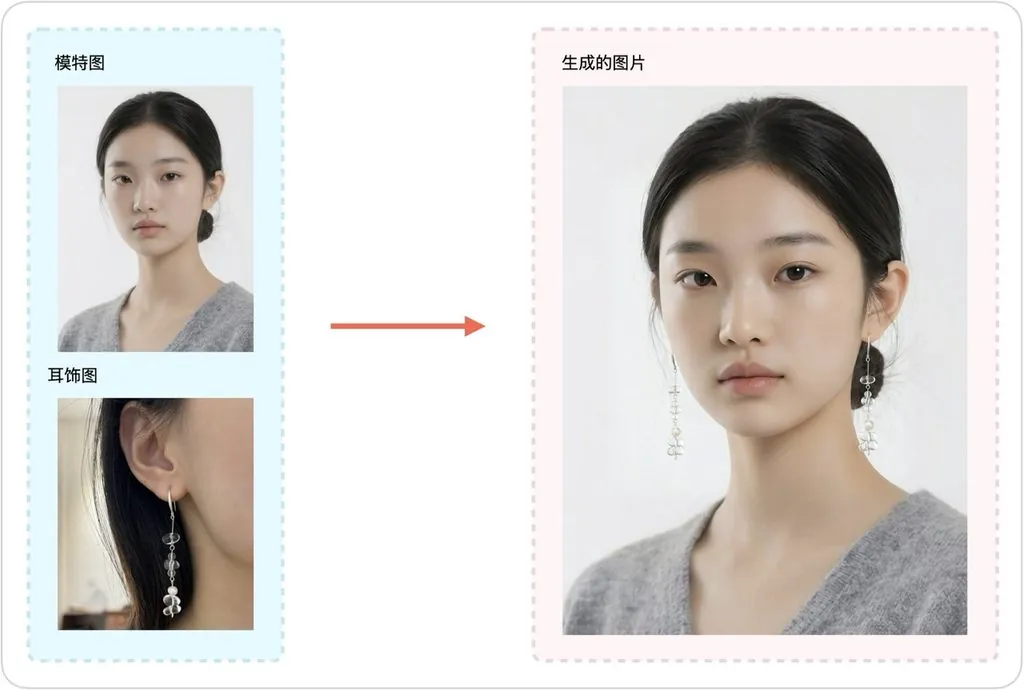
How to Use the AI Earrings Try-On Tool
Step 1: Upload a Model Photo
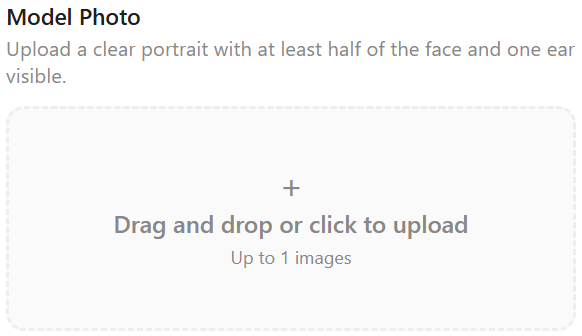
Click the upload area or drag in the model photo. Make sure the face and at least one ear are clearly visible. A front-facing or three-quarter portrait usually produces the most predictable result.
Step 2: Upload the Earring Image
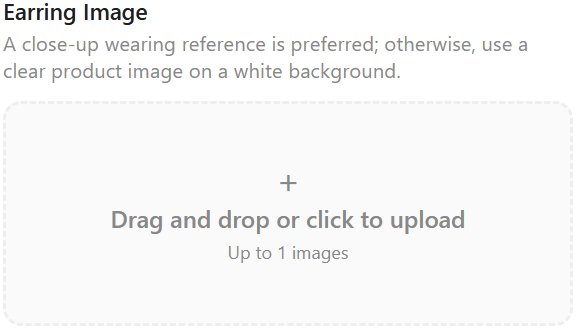
Upload a clear earring image. A close-up wearing reference is recommended because it provides useful scale and placement information. If one is not available, use a sharp product photo with a simple background and an unobstructed view of the entire design.
Step 3: Enter the Earring Size
Enter the length of the earring's longest edge in millimeters. Use the real product measurement whenever possible. Accurate size information helps prevent the generated jewelry from appearing noticeably too large or too small.
Step 4: Generate and Review the Result
Start the generation process and keep the page open until the image is ready. Do not judge the result only by whether it looks attractive. Check the following details before using it commercially:
- Earring size and proportion
- Piercing or clip position
- Left and right orientation
- Hanging angle and gravity
- Product shape and symmetry
- Metal, gemstone, pearl, and surface details
If the jewelry is misplaced or the scale is inaccurate, first verify the size value. Then try a clearer model image or a wearing reference that shows the product's true proportion.
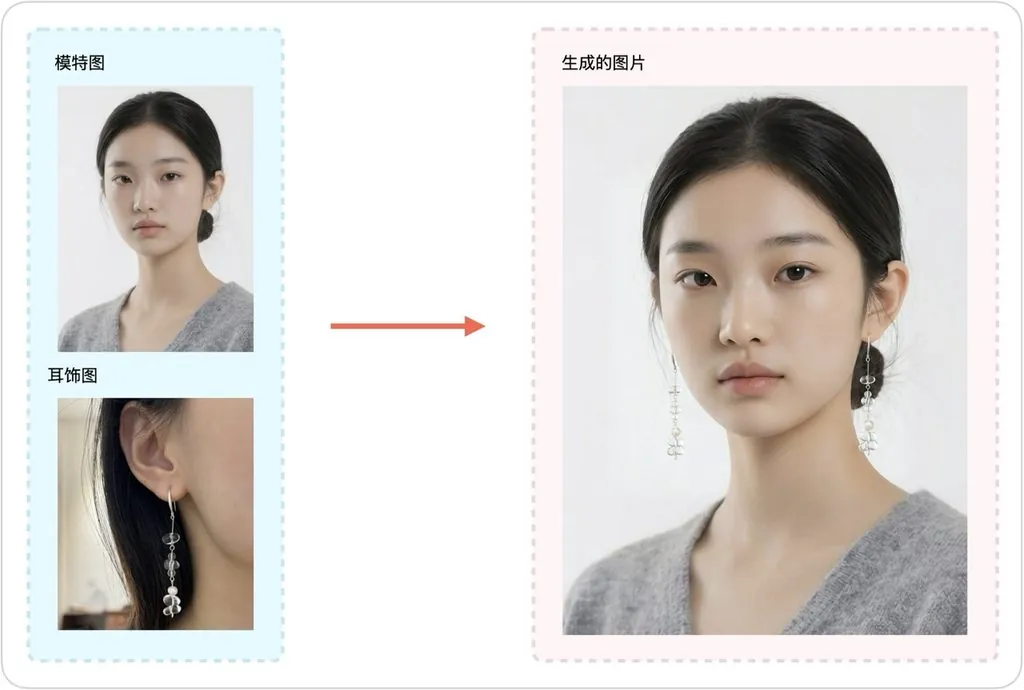
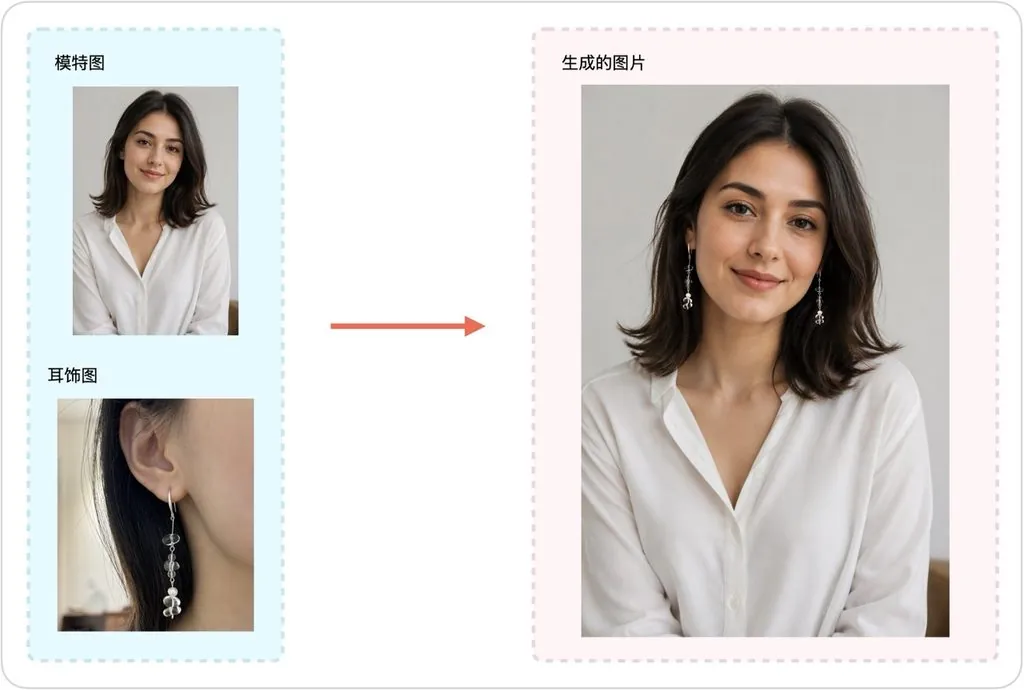
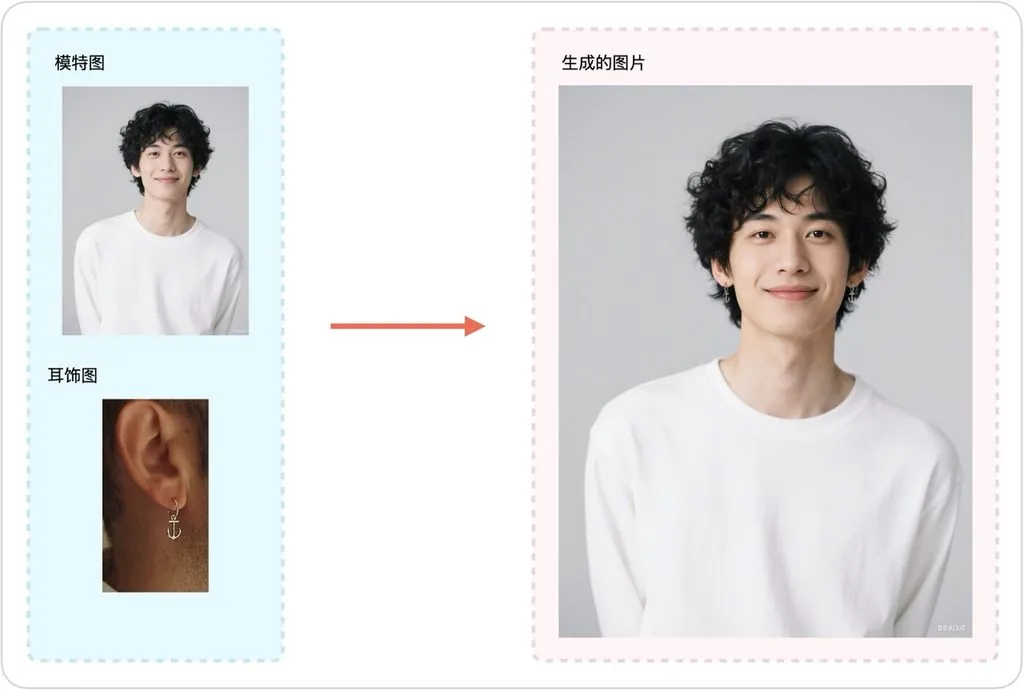
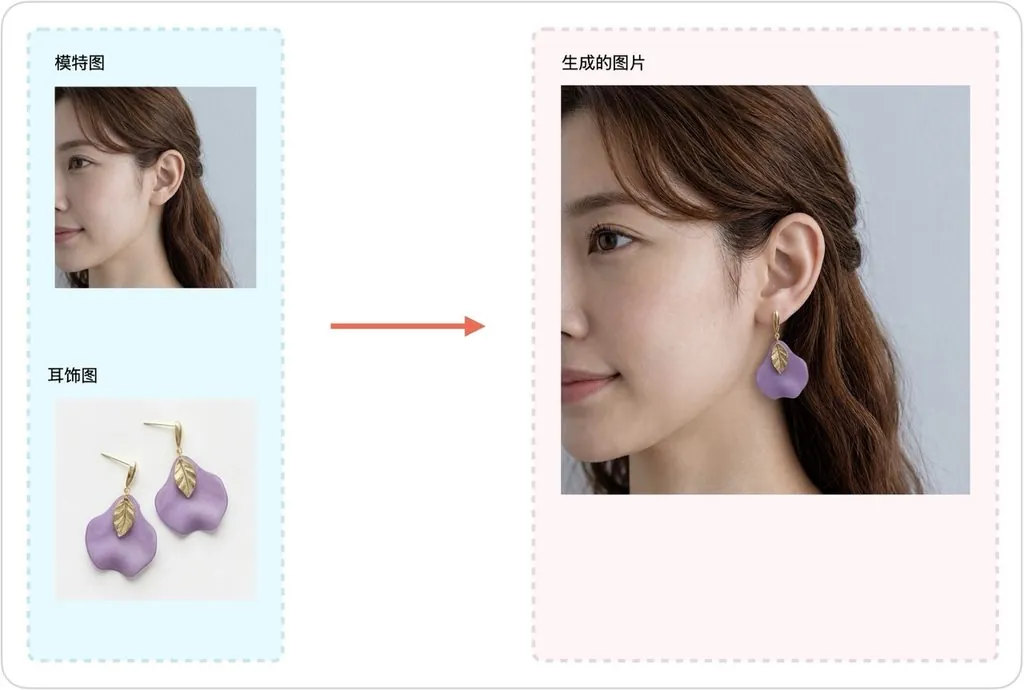
AI Earrings Try-On Examples
The examples below demonstrate how the tool can place different earrings on a model while maintaining a natural relationship between the jewelry, ear, hair, face, and lighting.
Tips for More Realistic Earring Try-On Images
- Use sharp source images without motion blur or heavy compression.
- Choose a model photo where the target ear is fully visible.
- Enter the actual longest-edge measurement in millimeters.
- Prefer a real wearing reference for hooks, clips, and drop earrings.
- Review product shape, stone count, metal color, and left-right orientation before publishing.
Frequently Asked Questions
Can I use a product-only image?
Yes. A clean product image can work well for simple studs and hoops. For earrings with hooks, clips, long drops, or complex structures, a real wearing reference usually gives the AI better information about scale and attachment.
How accurate is the generated earring size?
Accuracy depends on the model photo, the product reference, and the millimeter value you enter. Always compare the result with the product's actual measurements before using the image on a product page.
Why is the earring placed incorrectly?
Common causes include hair covering the ear, a low-resolution portrait, an unclear attachment point, or an inaccurate size value. Replace the weakest source image and generate again.
Create Your AI Earrings Try-On Image
An effective AI earrings try-on workflow starts with a visible ear, a clear jewelry reference, and an accurate product measurement. Prepare those three inputs carefully, review the generated scale and details, and the tool can help you create useful e-commerce visuals much faster.